Getting started in astronomy can feel overwhelming — there's so much to explore, and it's easy to get lost in the details. Over the years, through conversations with fellow enthusiasts, I've gained insight into what makes the journey enjoyable and what can unintentionally take away from the simple wonders of stargazing. Observational astronomy, using telescopes to explore the night sky, is just one piece of the larger puzzle, alongside astrophysics and astrophotography. Each is deeply connected, offering endless opportunities to learn and appreciate the cosmos.
Stargazing is a skill that unfolds over time, much like learning to play an instrument or speak a new language. If I were to design a syllabus for becoming a skilled observer, I'd structure it as a journey — beginning with simply looking up at the night sky, advancing to using a manual telescope, and eventually mastering more advanced techniques like astrophotography. This guide is primarily for beginners, but I hope even seasoned astronomers will find something valuable that resonates with their own journey.
Level 1: The Naked Eye Observer
Beginner · Weeks 1–2
Across countless online forums, a familiar question echoes: "Which telescope should I buy?" — often followed by "to see planets" or "to view lunar craters." Some may have the means to invest in a high-tech GoTo (computer-controlled) telescope that effortlessly locks onto Jupiter, but in doing so, they might miss one of the most rewarding aspects of astronomy — the thrill of discovery. There's something invaluable about learning to navigate the night sky, a process that deepens both understanding and appreciation for the cosmos. There's a special kind of joy (and occasional frustration) in star-hopping your way to the Andromeda Galaxy. Or sometimes, you know exactly where the nebula is supposed to be, but the circle of sky in your eyepiece refuses to reveal it.
But trust me when I say that knowing "What the hell are we looking at?" is an underrated but crucial astronomy skill.
How to get started
Start by looking up. Look up at a clear, cloudless night sky. Appreciate the light years between you and what you are looking at. The starlight has traveled uninterrupted for millions of years from the stars, only to stop at your eyes. Appreciate the vastness of space. You will soon be able to recognize the patterns and names of the constellations. Find a star chart and start with the popular constellations. Look at Orion or the Big Dipper. You will quickly understand the scale of things — how big is Orion supposed to be? What does the Sword of Orion look like? What does the Orion Nebula look like to the naked eye?
My examples and experiences come from the Northern Hemisphere, but Orion is a perfect example of a constellation that unites stargazers across both hemispheres. No matter where you are in the world, you can look up and find its familiar shape, making it a shared reference point for all astronomers. The zodiac constellations are another significant set of star patterns that connect astronomers and stargazers across the globe.
Key Skills: Navigating the Night Sky
Using Star Charts
Start with a good old-fashioned paper star chart (planisphere) for a hands-on experience — there's something special about learning this way before relying on screens. Take a moment to observe the marked directions — do they match what you expect? Understanding celestial orientation is key to finding objects. Hint: Check if East and West are where you expected them.
You'll quickly get the hang of orienting yourself, reading magnitudes, and understanding what's visible. And as you advance, you might never use a paper map again — so enjoy this part of the journey while it lasts.
Modern tools make stargazing even easier. As a next step, try apps like Google Sky Map, Sky Tonight, or any app that uses your phone's gyroscope to display real-time star maps. Just point your phone at the sky, and it will reveal what's up there — no prior experience required.
- Look for prominent constellations and star patterns specific to your hemisphere, such as Orion or the Big Dipper.
- Locate Polaris, the North Star, which might appear dimmer than anticipated.
- Observe how stars traverse the night sky from your vantage point, noting their rising and setting patterns.
- Begin recognizing the brightest planets — Venus, Jupiter, Saturn, and Mars — by their distinctive characteristics: their positions along the ecliptic, superior brightness compared to stars, and steady light that doesn't twinkle.
- Study the lunar cycle and its phases. You'll quickly appreciate new moon nights for their stargazing conditions, when the dark sky reveals its treasures with clarity.
Other recommended tools: Stellarium, Sky & Telescope's Interactive Sky Chart, In-The-Sky.org
Before you shop: Why does aperture matter more than magnification? — the question sitting underneath every "which telescope should I buy?" thread, and the one worth answering before you spend anything.
Level 2: First Steps with a Manual Telescope
Beginner · Weeks 3–6
Now that you're familiar with the night sky, it's time to get hands-on with a manual (non-computerized) telescope. But for many beginners, this is where things can stall. Maybe you don't have access to a telescope, feel overwhelmed by the endless choices, or worry about the cost. Don't let that stop you — there are plenty of ways to get access to a telescope without diving in headfirst.
Your first step is to join a local astronomy club — or even a county or city one, if you can travel. These clubs are filled with enthusiasts of all levels and a wide range of telescopes. Many offer telescope loans, and some libraries do too!
Attend a star party, where you can show up with just warm clothing, a blanket, and a red flashlight. You'll get to look through different telescopes, learn firsthand about resolution and magnification, and get advice on what to buy when you're ready.
And if you accidentally turn on a bright flashlight or car headlights and get yelled at… well, consider that your official initiation.
Key Skills: Setting Up and Focusing the Telescope
First things first — if you've never looked through a telescope, be prepared for a surprise: most telescopes invert the image! That's normal, and your brain will quickly adjust.
Storage & Unboxing
Proper storage is crucial for protecting your telescope's optics and ensuring everything stays aligned. When unboxing, keep track of all parts and handle lenses and mirrors carefully — dust and fingerprints are not their friends.
Setting Up the Mount
Your mount is what allows the telescope to move smoothly across the sky. Here are the main mount types:
- Alt-Azimuth (Alt-Az): Moves up/down (altitude) and left/right (azimuth) — simple and intuitive.
- Dobsonian: A large, stable Alt-Az mount built for Newtonian reflectors. Great for deep-sky viewing.
- Equatorial (EQ): Aligned with Earth's rotation, allowing smooth tracking with a single axis (right ascension). Ideal for astrophotography.
Eyepieces & Magnification
A higher-numbered eyepiece (e.g., 25mm) gives a wider, brighter view, while a lower-numbered eyepiece (e.g., 10mm) provides higher magnification but a narrower field of view. Start with the highest-numbered eyepiece to locate objects easily, then switch to a lower-numbered one for detail.
You don't have to take this on faith. The eyepiece simulator draws the same object through whichever telescope and eyepiece you pick, so you can see what a 25mm and a 10mm actually frame before you own either one.
Focusing & First-Time Viewing
- Daytime practice: Before pointing at the stars, aim at a distant object like a tree, hill, or streetlight. This helps you understand how focus works.
- Nighttime adjustments: Once you switch to the sky, fine-tune the focus. A nearby bright star is a good first target — it should appear as a crisp point of light, not a blurry blob.
- Be patient! The higher the magnification, the faster objects drift due to Earth's rotation. If you lose sight of something, just nudge the telescope and refocus.
Recommended Equipment
- A Dobsonian telescope (4", 6", or 8") — simple, powerful, and great for beginners
- A red flashlight to preserve night vision
- A star chart or an app like Sky Tonight
An 8" Dobsonian is the classic first real telescope: the most aperture per dollar on the market, nothing to align, and no batteries to run flat at 1am.
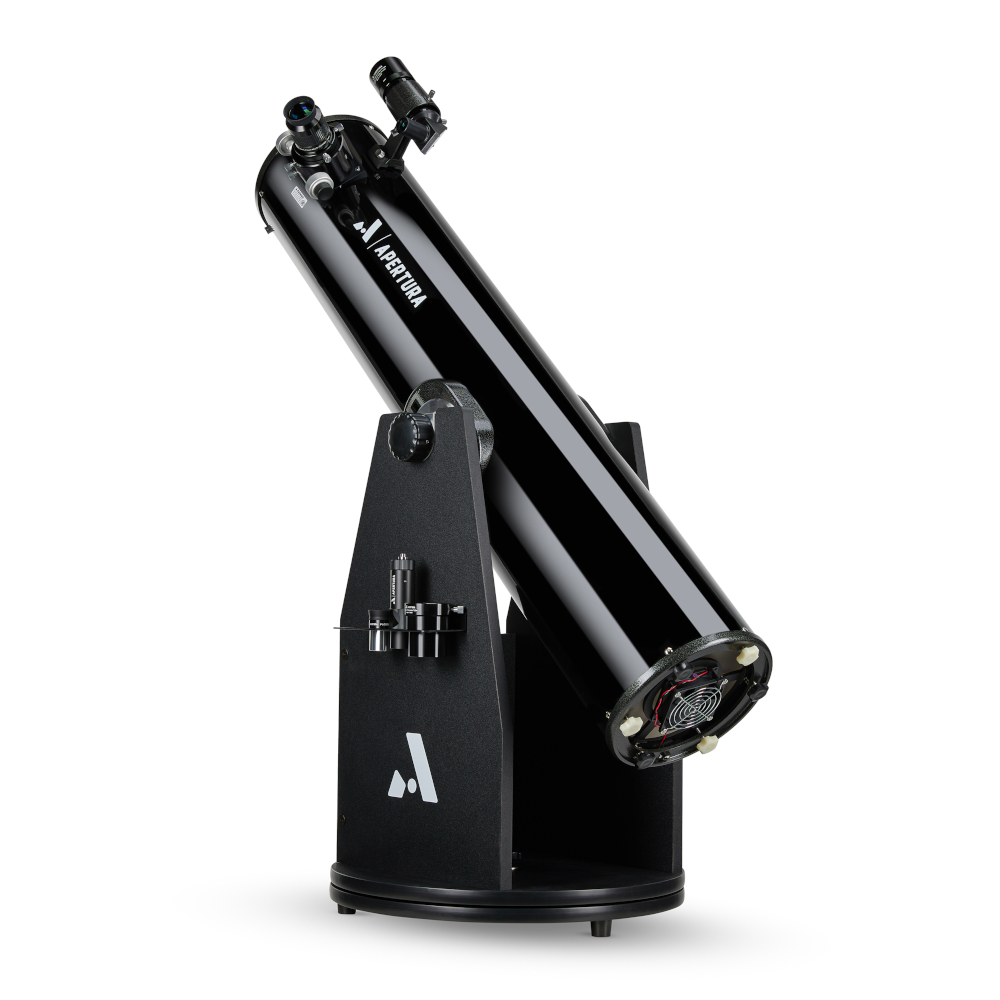
telescope
Apertura AD8 Dobsonian
1 price · from High Point Scientific
Go deeper: Why Does a Dobsonian Exist? · Dobsonian vs Refractor · Best telescopes under $500 · Why do astronomers own so many eyepieces?
Practice: Spend time manually locating Saturn's rings, Jupiter's moons, and the Orion Nebula.
Learning to use a telescope is a skill — don't worry if things feel tricky at first! The more you practice, the more intuitive it becomes. Soon, you'll be effortlessly gliding across the night sky, spotting planets, nebulae, and galaxies with ease.
Level 3: Deep-Sky Exploration & Observing Challenges
Intermediate · Months 2–4
At this stage, you're ready to go beyond the bright and familiar and start tracking down fainter deep-sky objects. This is where astronomy turns into a treasure hunt, and the thrill of finding something on your own becomes the real reward.
You can look forward to exploring the Messier Objects — all 110 of them. Most are easy to find from the Northern Hemisphere, as 103 were catalogued in 1781. The M in M42 (Orion Nebula) stands for the Messier Catalogue.
1. Star Hopping: Navigating Without GoTo Technology
If you've been relying on apps to point things out, it's time to level up. Star hopping is the art of using bright, easily recognizable stars as stepping stones to find fainter targets.
- Start with brighter Messier objects like the Andromeda Galaxy (M31) or the Orion Nebula (M42).
- Use a paper star chart or an app like Stellarium or SkySafari to plan your route.
- Binoculars first: If an object is tough to spot through your telescope, try binoculars to scan the area.
Star hopping isn't a phase you grow out of, either — experienced observers still do it, and for reasons that have nothing to do with not owning a GoTo.
2. Understanding Sky Conditions
Deep-sky objects (DSOs) are faint, so understanding sky quality is crucial.
- Light pollution matters: If you're in the city, nebulae and galaxies will be washed out (here's the physics of why). Seek darker skies when possible — a two-hour drive buys you more than a bigger telescope does, which is its own rabbit hole. We keep a growing list of dark-sky sites with what's actually visible from each.
- Seeing vs. Transparency:
- Seeing = how steady the atmosphere is (affects planets and stars).
- Transparency = how clear the sky is (affects DSOs).
- Moon phases: A bright Moon makes it nearly impossible to see faint objects. Plan deep-sky sessions around the New Moon.
3. Observing Techniques for Faint Objects
- Averted vision: Instead of looking directly at an object, look slightly to the side — your peripheral vision is more sensitive to dim light.
- Dark adaptation: Give your eyes 20–30 minutes in total darkness before observing. Avoid white light; use a red flashlight instead.
- Filters for nebulae: A UHC (Ultra High Contrast) filter can help bring out details in nebulae like the Veil Nebula or Lagoon Nebula. A filter doesn't make anything brighter — it makes the background darker, which is not the same thing at all.
4. Logging & Sketching Your Observations
Keeping an observing journal helps track sky conditions, telescope settings, and objects seen. Sketching objects trains your eye to notice subtle details you might otherwise miss.
5. Expanding Your Target List
Once you're comfortable with the Messier catalog, challenge yourself with:
- NGC objects — thousands of galaxies, nebulae, and clusters.
- Double stars & variable stars — fun targets when galaxies are too faint.
- Seasonal challenges — different DSOs become visible as the seasons change.
Recommended Equipment
- A larger Dobsonian (10"+), Schmidt-Cassegrain (SCT), or Maksutov-Cassegrain telescope for better light-gathering power
- A UHC or OIII filter to enhance nebulae visibility
- Binoculars (7×50 or 10×50) for wide-field scanning and planning star hops
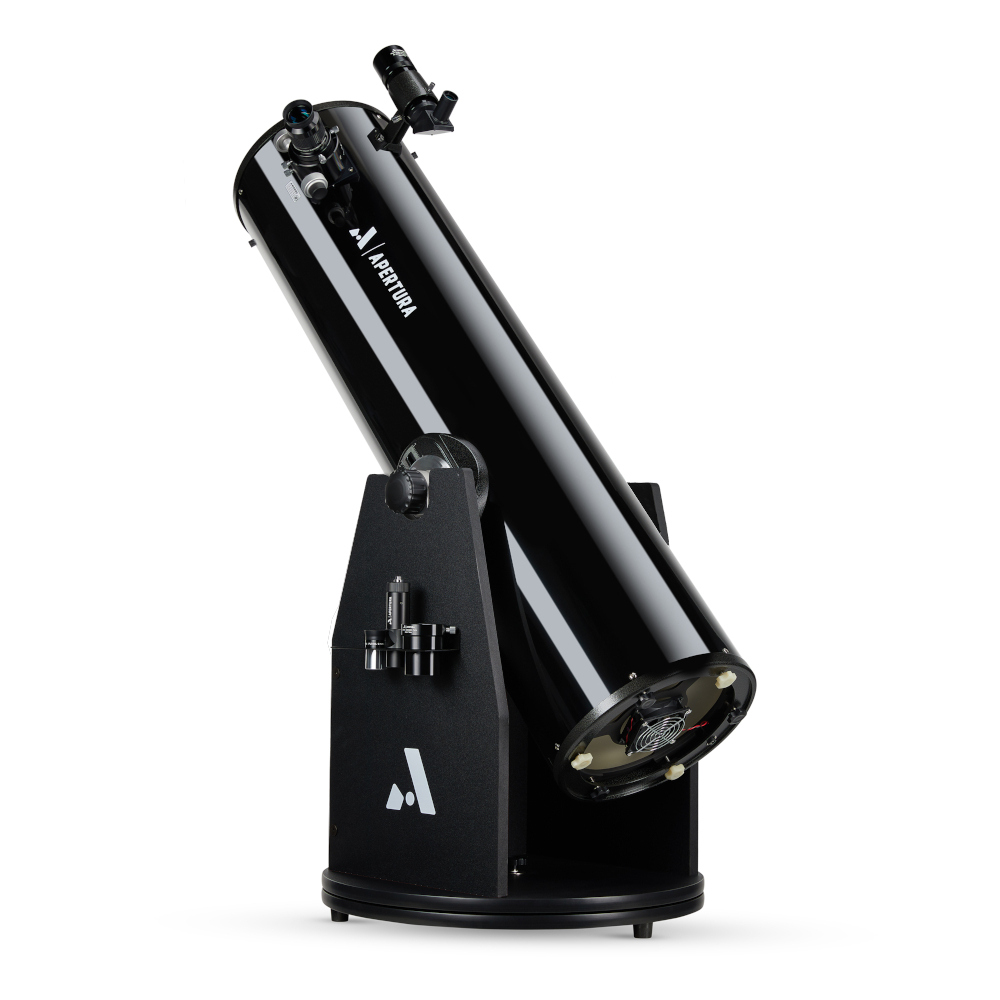
telescope
Apertura AD10 Dobsonian 10" Telescope with Accessories
1 price · from High Point Scientific
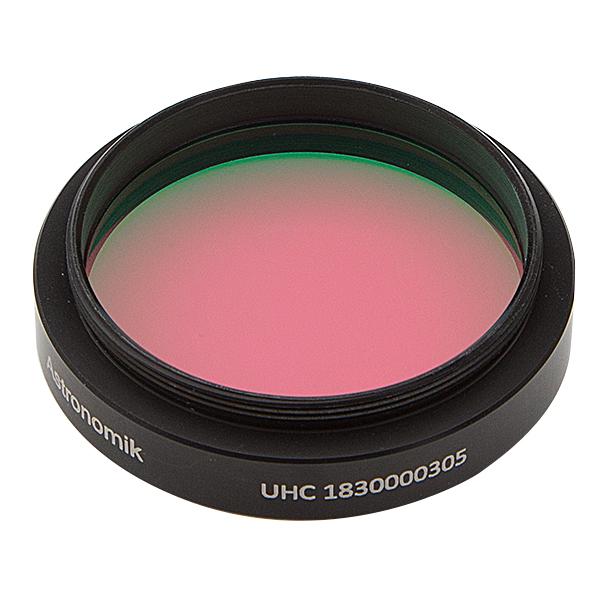
filter
Astronomik UHC Filter 2″
1 price · from Agena AstroProducts
More options: every Dobsonian we've catalogued · nebula and light-pollution filters
Practice Challenge
Start by finding these deep-sky gems:
| Object | What it is |
|---|---|
| Andromeda Galaxy (M31) | Massive spiral galaxy — best under dark skies |
| The Pleiades (M45) | Stunning open cluster, visible to the naked eye |
| Hercules Cluster (M13) | Bright globular cluster packed with hundreds of thousands of stars |
Level 4: Tracking and Advanced Equipment
Intermediate–Advanced · Months 4–8
By now, you've mastered manual telescopes and star-hopping your way across the night sky. It's time to take things up a notch — enter tracking mounts and computerized telescopes.
Key Skills to Learn
- Mastering an Equatorial Mount — Unlike Alt-Az mounts, equatorial mounts follow Earth's rotation, keeping objects in view with smooth adjustments. Once aligned properly, you'll only need to tweak a single axis.
- Setting Up a GoTo Mount — GoTo mounts use a built-in database to automatically locate celestial objects. They require proper alignment (usually a two-star or three-star method), but once set up, you'll have a personal guide to the universe at the push of a button. Tracker, GoTo, or harmonic? The three mount brains, explained — and if an equatorial mount looks absurd to you the first time you see one, there's a good reason for that.
- Observing Faint Nebulae, Globular Clusters, and Double Stars — Tracking mounts allow longer, more stable viewing sessions of objects like the Ring Nebula (M57), the Whirlpool Galaxy (M51), and dazzling binary stars like Albireo.
- Basic Astrophotography with a Smartphone Adapter — You don't need a $3,000 rig to start. A simple smartphone adapter can capture the Moon, planets, and even bright nebulae with surprisingly good results.
- Using a RACI Finder — A Right-Angle Correct-Image (RACI) finder makes star-hopping much easier by providing an upright, correctly oriented view. Browse finder scopes →
Recommended Telescopes
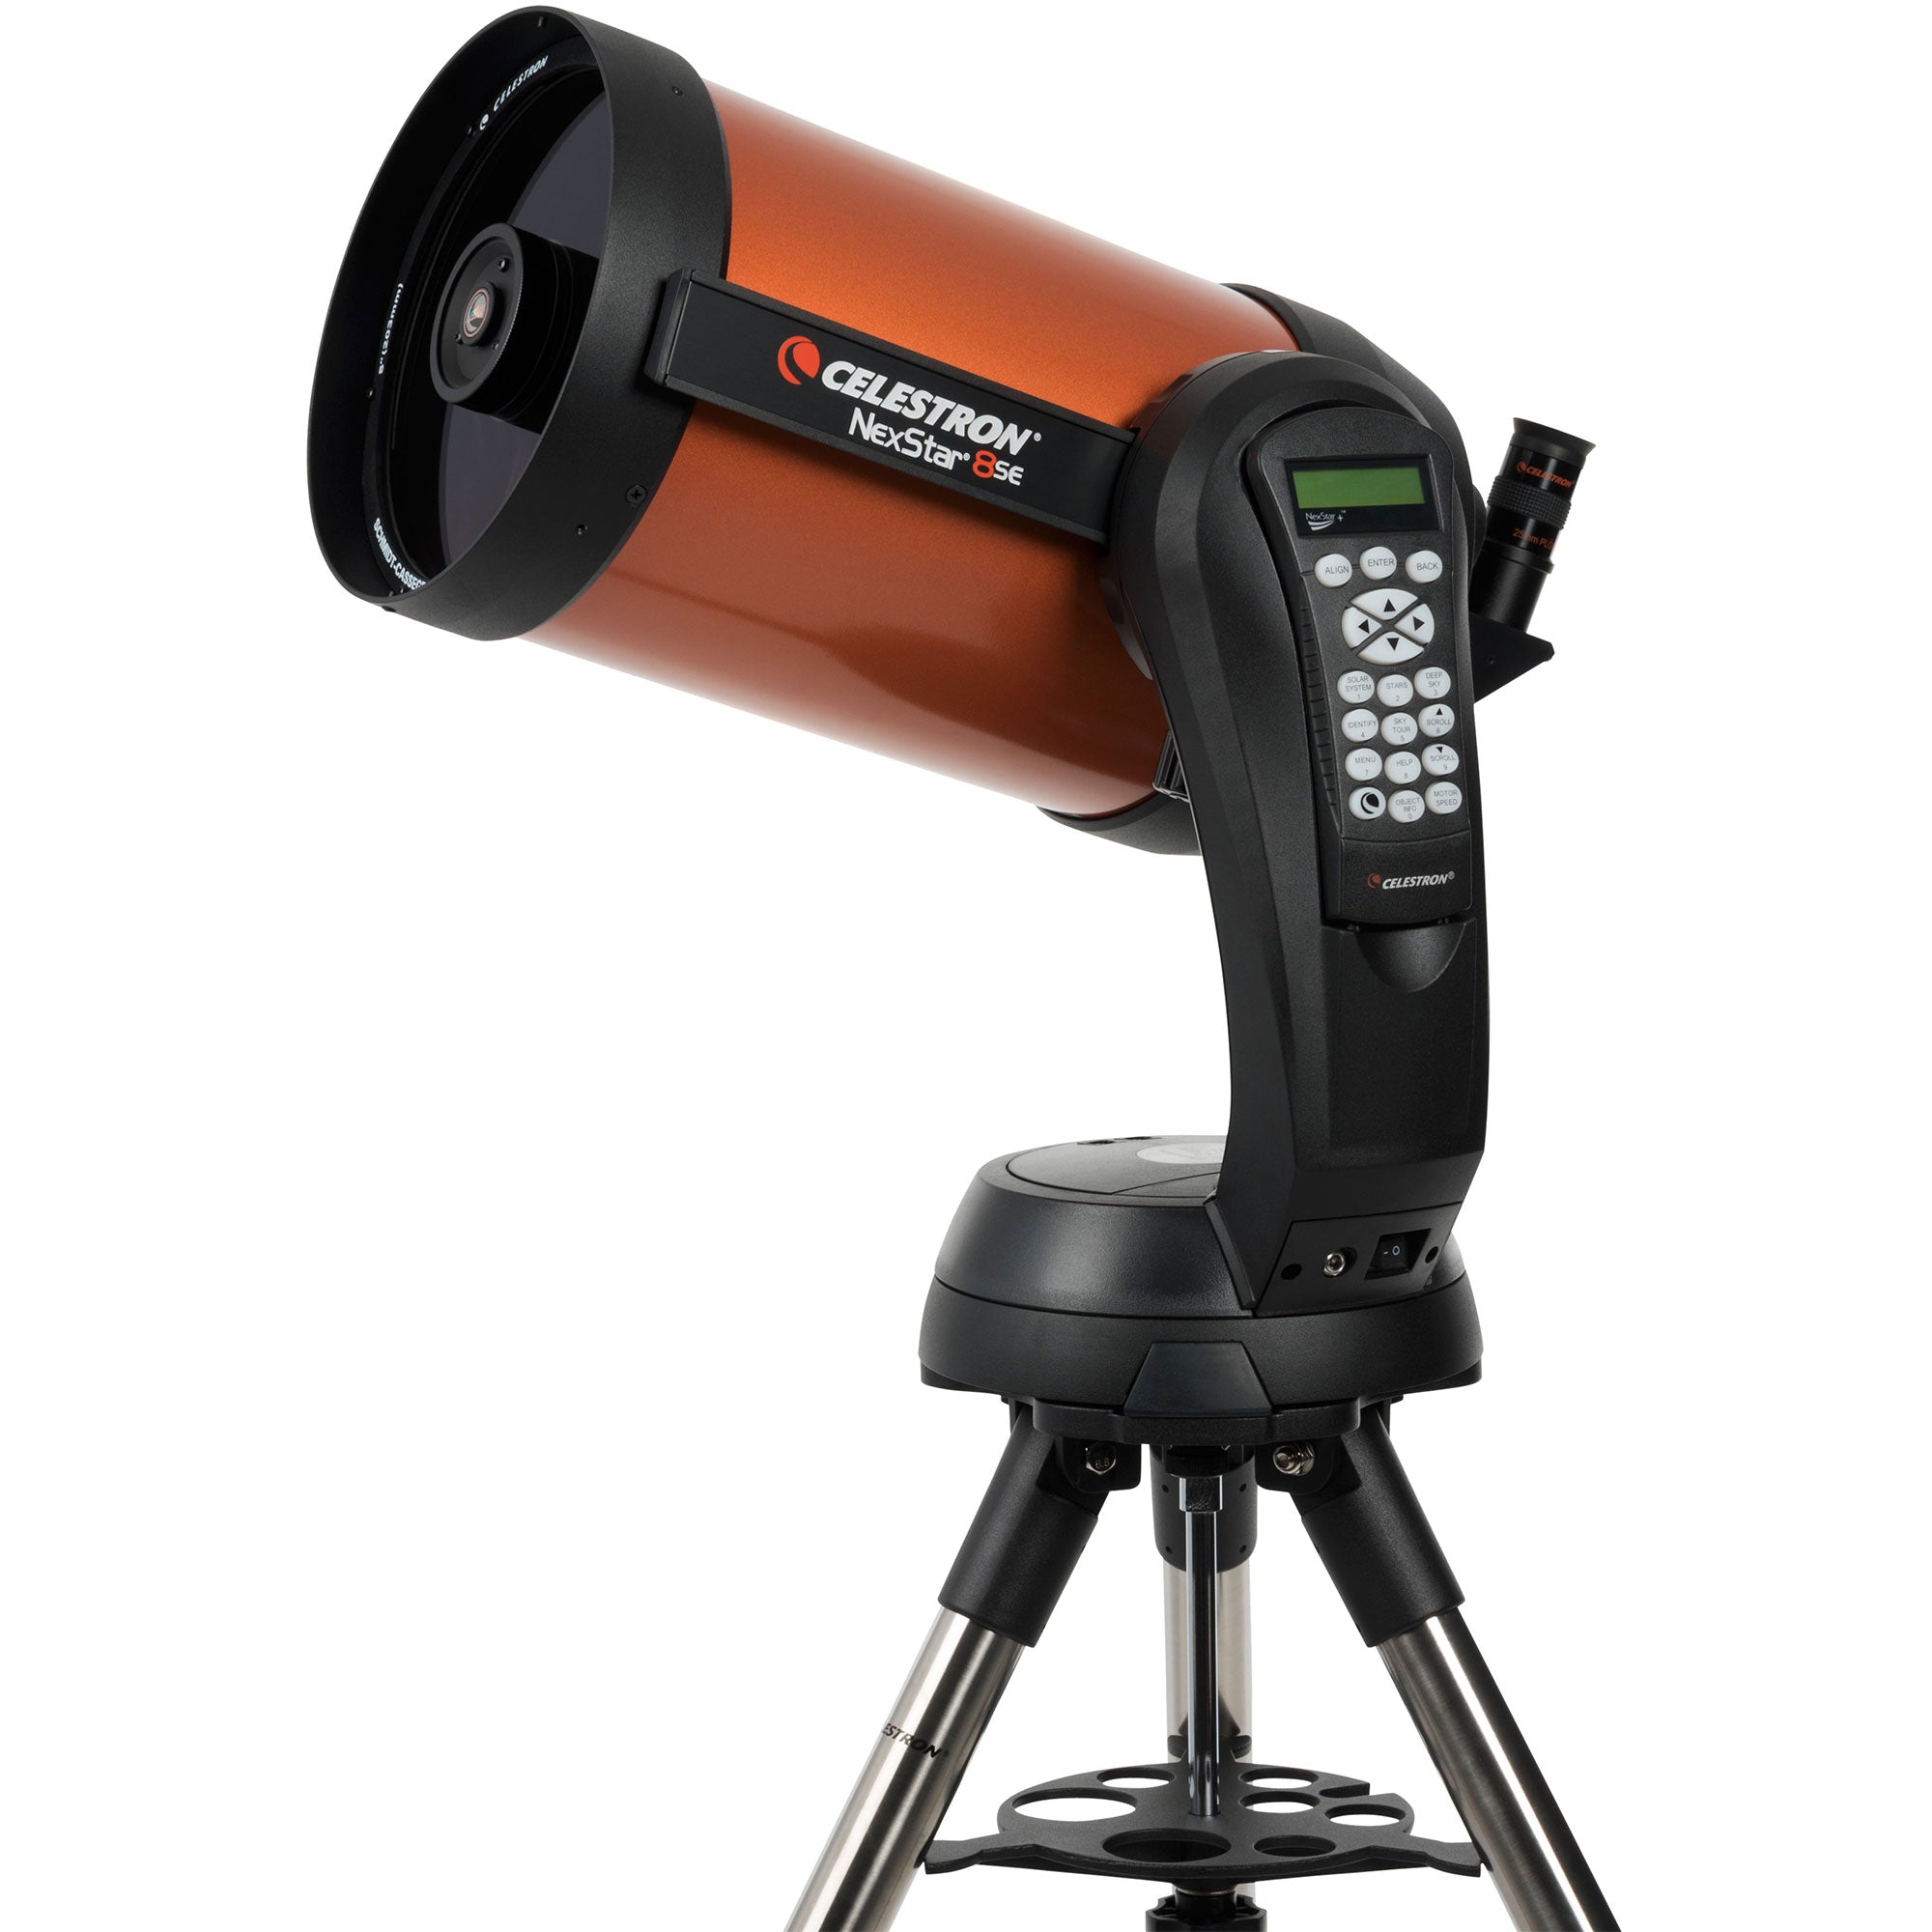
One of my telescopes is a Celestron 8SE, and I love the quality of the optics and ease of use. The 6SE and 8SE are the two most common entry points into a GoTo SCT — same mount, same software, different amount of glass:
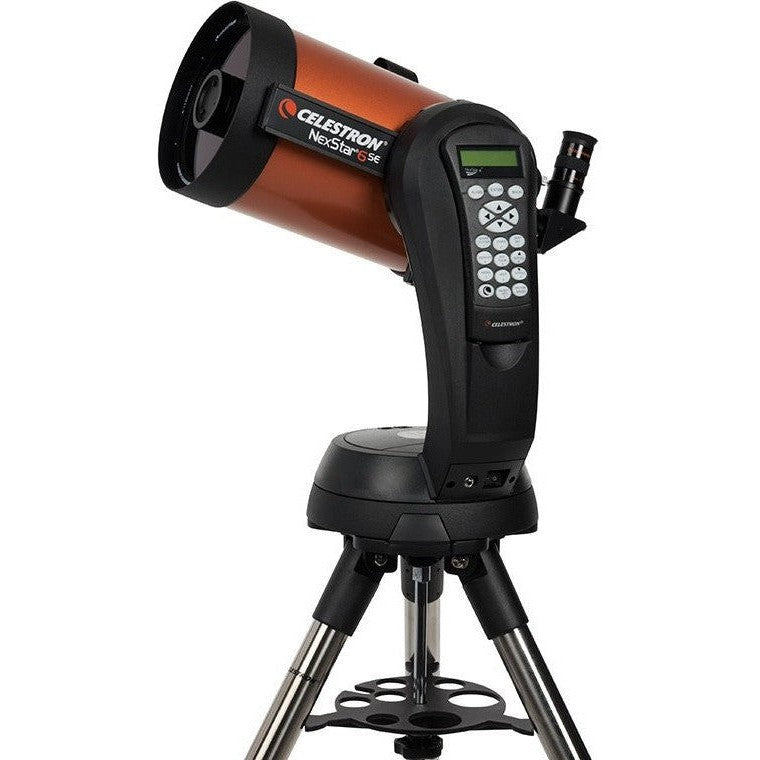
telescope
Celestron NexStar 6SE
5 prices · from Agena AstroProducts
telescope
Celestron NexStar 8SE
5 prices · from Agena AstroProducts
The extra two inches of aperture is not a small difference, and neither is the weight you carry outside. We wrote the comparison out properly: NexStar 6SE vs 8SE — and if you're weighing the 8SE against the same money in a Dobsonian, that one too.
Level 5: Astrophotography & Data Analysis
Advanced · Months 8–12+
So, you've spent months navigating the night sky, finding faint nebulae, and tracking celestial objects like a pro. Now you want to capture those stunning views and share them with the world. Welcome to astrophotography — where science meets art, patience meets excitement, and a little trial-and-error leads to breathtaking cosmic images.
There's something magical about seeing Saturn's rings with your own eyes. But imagine capturing the vibrant colors of the Orion Nebula, the swirling arms of a galaxy, or Jupiter's moons in motion — all from your backyard. Astrophotography lets you record what the eye cannot see. With long-exposure imaging, we can bring out hidden colors, details, and structures that remain invisible at the eyepiece.
Two Paths to Astrophotography
Deep-Sky Astrophotography (Nebulae, Galaxies, Star Clusters)
Uses long exposures to capture faint light over time. Requires a tracking mount to compensate for Earth's rotation. Images are stacked and processed to bring out hidden details.
Starter gear:
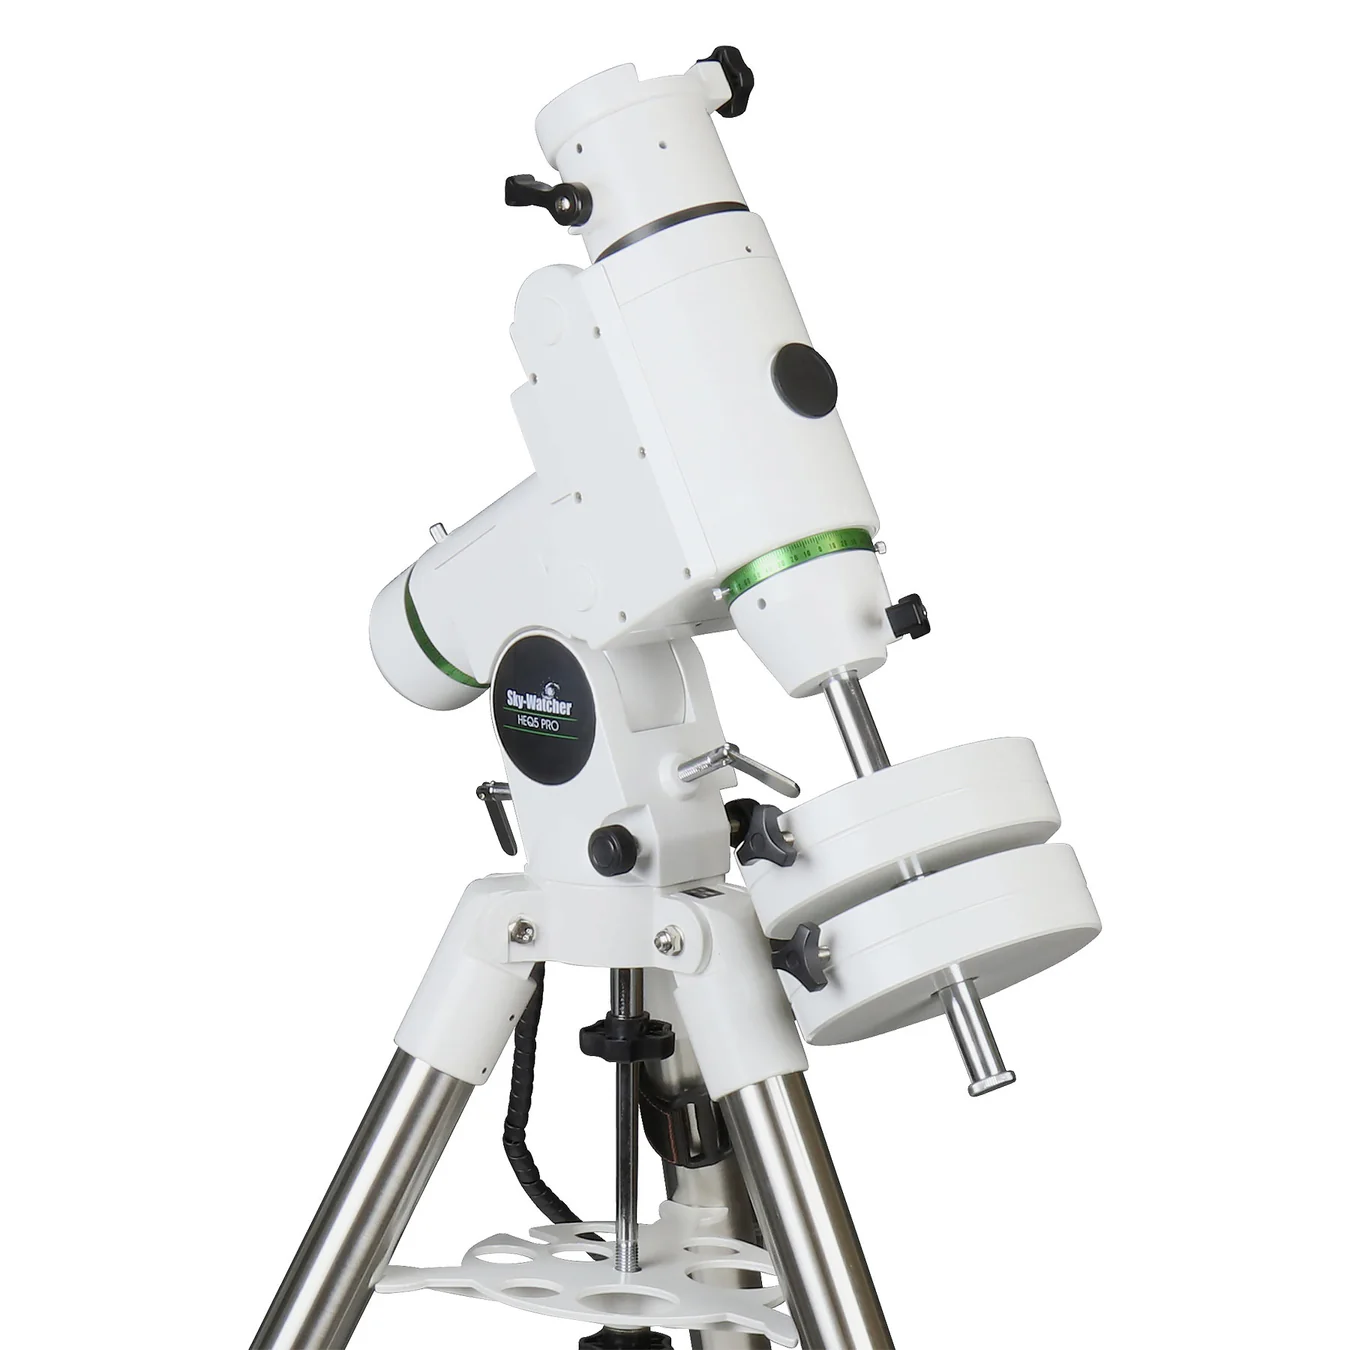
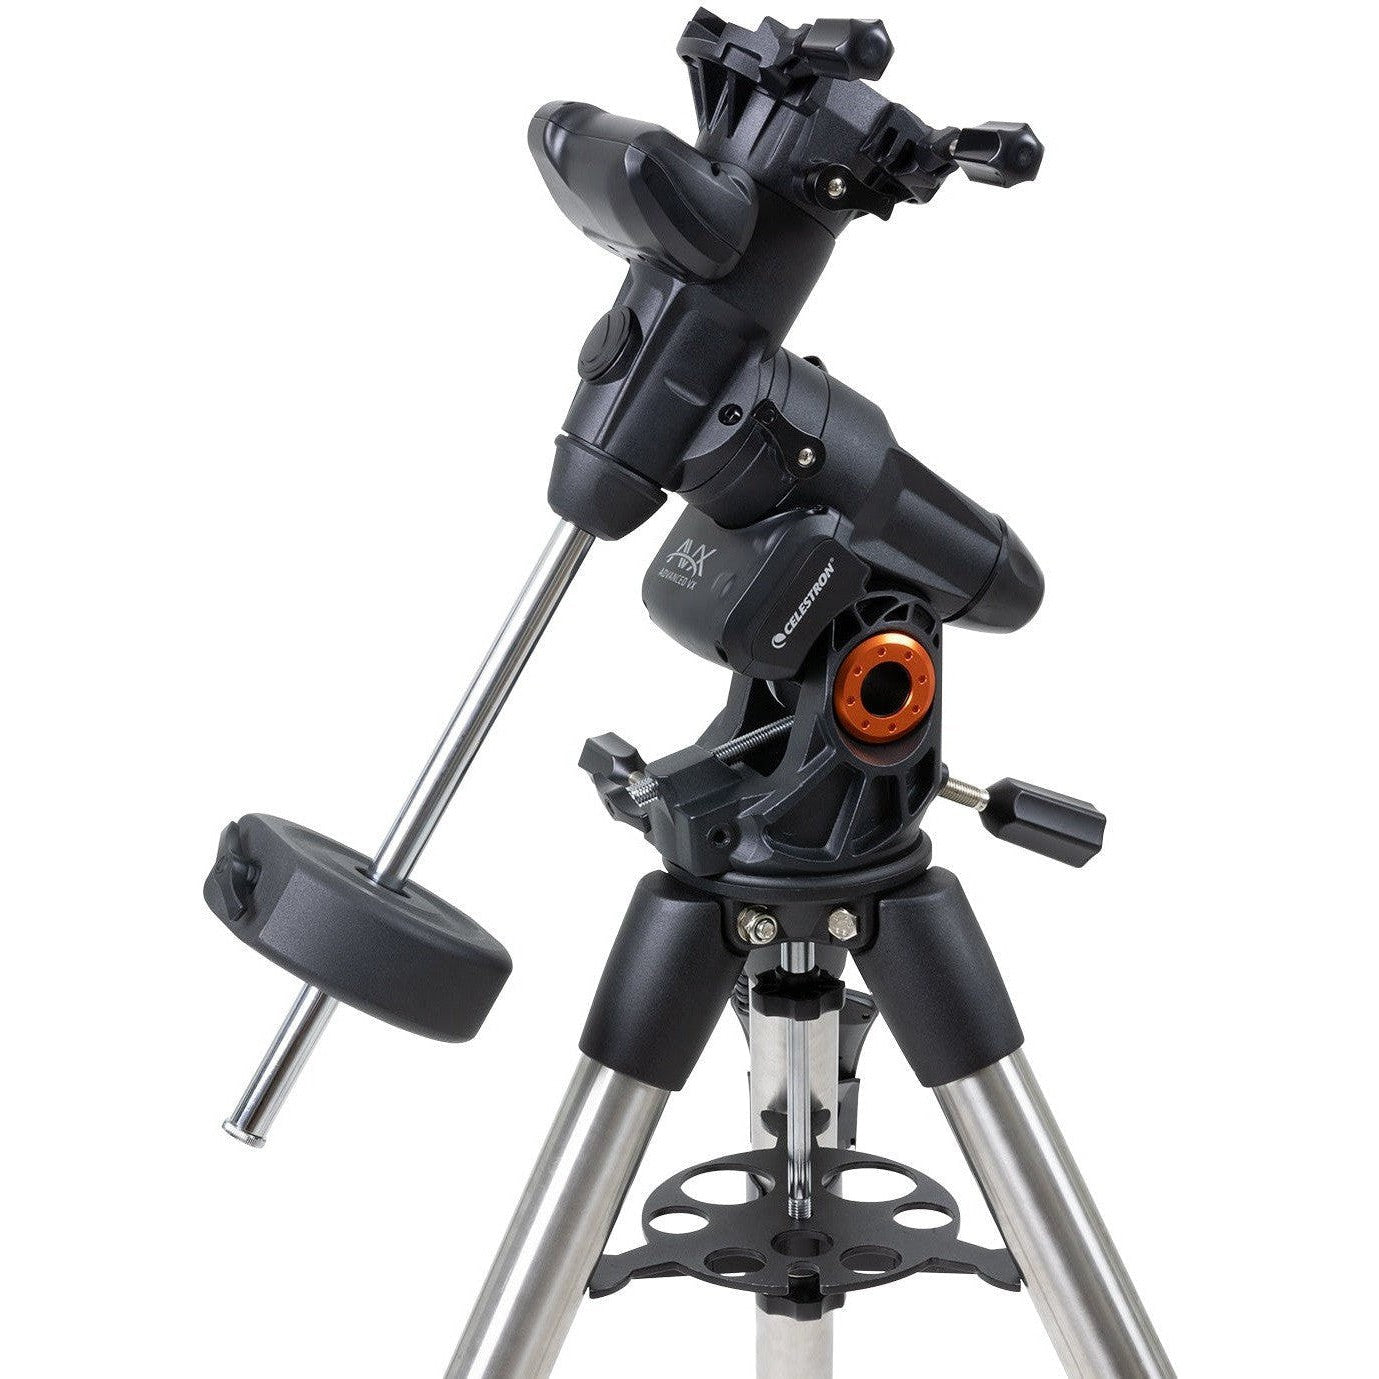
- Tracking mount (Sky-Watcher HEQ5 or Celestron AVX)
- DSLR or dedicated astro camera (e.g., Canon EOS Rebel or ZWO ASI120MC)
- Software: DeepSkyStacker, Photoshop, or PixInsight
mount
Sky-Watcher HEQ5 Pro SynScan GoTo Mount
2 prices · from Starizona
mount
Celestron Advanced VX (AVX) Equatorial Mount
2 prices · from High Point Scientific
The mount is the part beginners underspend on and then replace. Your first astrophotography setup walks through why, and how to actually start with a ZWO and an ASIAIR covers the modern shortcut. The f/number on the box matters more here than anywhere else in the hobby — what focal ratio actually tells you. Browse mounts and astro cameras if you want to compare specs side by side.
Beginner tip: Start with bright targets. The Orion Nebula (M42) and the Andromeda Galaxy (M31) are fantastic first deep-sky images.
Planetary & Lunar Imaging (Moon, Planets, Sunspots)
Captures short video clips instead of single images. Software stacks the best frames to create a sharper final image. No tracking mount required — just a telescope and a smartphone adapter.
Starter gear:
- Smartphone adapter (e.g., Celestron NexYZ)
- Planetary camera (ZWO ASI662MC — the modern successor to the much-loved ASI224MC)
- Software: RegiStax, AutoStakkert
Beginner tip: Start with the Moon. It's bright, easy to find, and doesn't require long exposures. Try capturing Jupiter next — its cloud bands and moons make it a fun challenge.
Key Skills to Learn
- Long-Exposure Imaging — Taking multiple long-exposure shots of nebulae and galaxies
- Stacking & Processing — Combining images in DeepSkyStacker or PixInsight to reduce noise and enhance detail
- Planetary Video Stacking — Using AutoStakkert or RegiStax to stack video frames for ultra-sharp planetary images
- Understanding Filters — Light pollution filters for deep-sky imaging, infrared filters for planetary detail
- Autoguiding — Using autoguiders to track stars with high precision for ultra-long exposures
Resources
YouTube channels:
- Nebula Photos — Straightforward beginner-friendly guides
- AstroBackyard — Deep-sky astrophotography with practical advice
- Chuck's Astrophotography — Gear reviews and imaging techniques
Websites & Forums:
- Cloudy Nights — The go-to forum for all things astronomy & astrophotography
- AstroBin — See and analyze images taken by other astrophotographers (why it exists, and why it's the most useful gear database in the hobby)
- Starizona — Tutorials on image processing and gear recommendations
Your First Astrophotography Challenge
- Beginner: Capture a detailed image of Jupiter and process it using stacking techniques.
- Deep-Sky: Take your first long-exposure shot of the Orion Nebula (M42).
Final Thoughts: Mastery & Beyond
Astrophotography is equal parts science, art, and patience. Some nights, you'll capture stunning images. Other nights, clouds will ruin everything. But every session teaches you something new.
Congratulations on making it this far! By now, you've built a strong foundation in astronomy, explored deep-sky objects, and maybe even captured your first astrophotography images. This journey is far from over — there's always more to discover.
Bonus challenges — push your skills further:
- Observe every planet in a single year.
- Complete the Messier List (all 110 deep-sky objects).
- Capture an ISS transit or a lunar eclipse with your camera.
Your next steps:
- Pick your current level and set new goals.
- Keep a stargazing journal to document your observations and techniques.
- Join communities like Cloudy Nights or a local astronomy club to connect with fellow stargazers.
No matter where you are in your astronomy journey, keep exploring, keep learning, and most of all — keep looking up.
Clear skies and happy observing.
More from the blog
Why I Chose the Celestron NexStar 5SE as My First Real Telescope
After months of research and two costly mistakes, here's what I actually learned
The $500 Astrophotography Rig That Actually Works
You don't need a $3,000 setup to capture the Orion Nebula. Here's the honest entry-level path.